The Irreplaceable Role of Boring Tools in CNC Machining
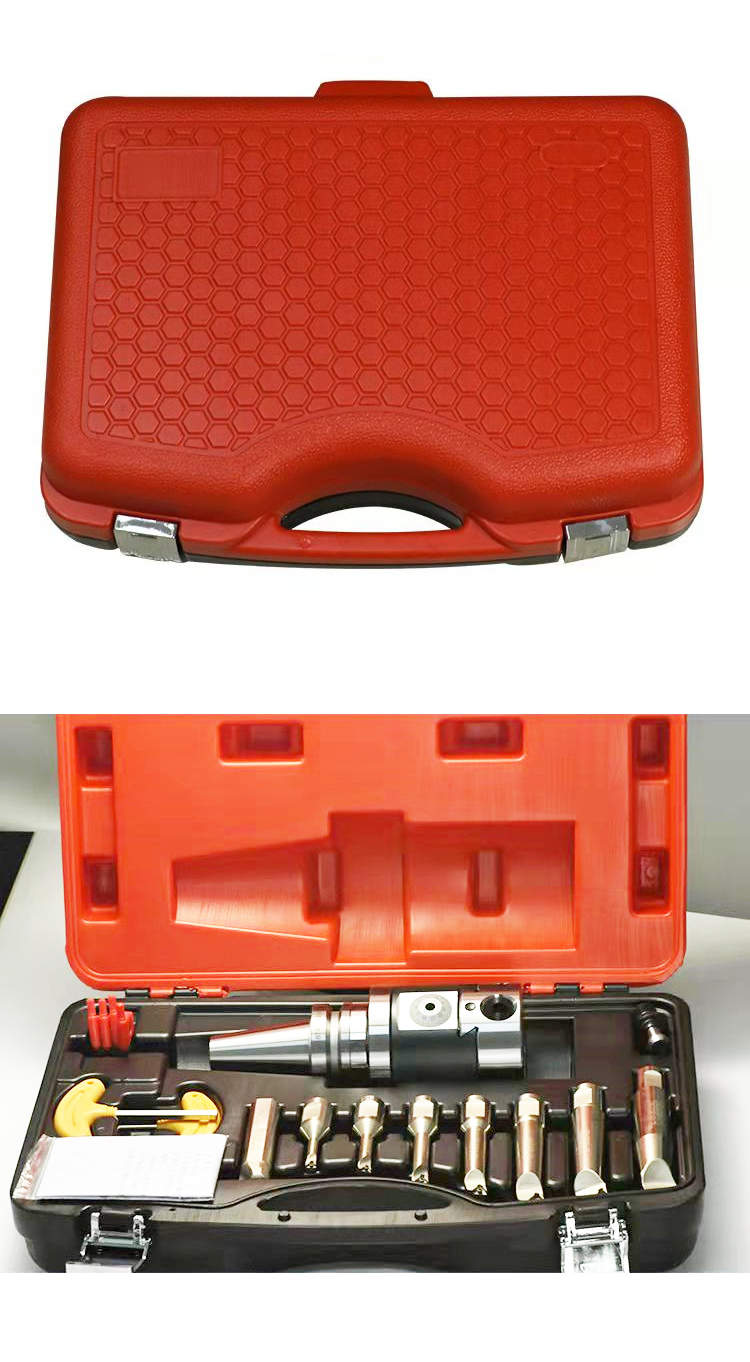
Date:2025-10-29Number:1104Boring tool is a type of boring cutter, typically featuring a round shank, although larger workpieces may utilize square tool shanks. Its most common applications include internal hole machining, hole enlarging (counterboring), and profiling. It is a tool specifically designed for roughing, semi-finishing, or finishing pre-existing holes, possessing one or two cutting parts. Boring tools can be employed on boring mills, lathes, or milling machines.
Depending on the clamping method, the shank comes in various forms such as square shank, Morse taper shank, and 7:24 taper shank. A double-edge boring tool has two cutting teeth distributed on opposite sides of the center that cut simultaneously. Since the radial forces generated during cutting balance each other out, it allows for higher cutting parameters and results in higher production efficiency. Double-edge boring tools are categorized into floating boring tools and fixed mounting boring tools based on whether the blade holder floats within the boring bar or not. Floating boring tools are suitable for the fine finishing of holes. They essentially function similarly to reamers, capable of producing holes with high dimensional accuracy and a smooth surface finish. However, they cannot correct deviations in the hole's straightness. To increase the number of possible regrinds, floating boring tools are often designed with an adjustable structure.
To accommodate the needs of various hole diameters and depths and to reduce the variety and specifications of boring tools, boring bars and tool heads have been designed as serialized basic components – modules. Based on workpiece requirements, appropriate modules can be selected and assembled into various boring tools, thereby simplifying tool design and manufacturing.

Advantages
Technical improvements in boring tools have primarily focused on the following four areas:
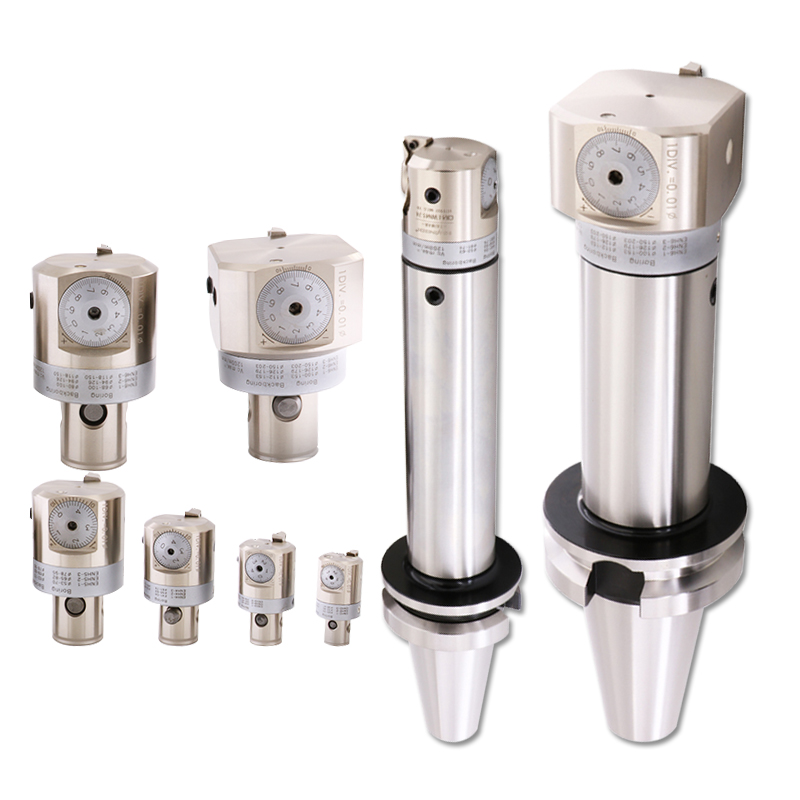
Digital Readout (DRO) Technology:
Since the advent of Numerical Control (NC) technology, digital display technology has been widely adopted in CNC machine tools and coordinate measuring machines. Furthermore, digital display measuring tools like digital micrometers and digital calipers have also seen extensive use. However, the application of digital readout technology to precision boring tools progressed slowly for a considerable time, primarily constrained by the use of coolant in boring operations and the high-speed rotation of the boring head.
In the past, extra care was required during boring operations on machining centers to prevent splashing coolant from entering the electronic components of the boring head's digital display unit. Nowadays, new boring tool designs with internal coolant channels have largely resolved this issue. As coolant can be directed directly to the cutting area through internal passages in the tool, complete isolation between the coolant and the boring head's DRO unit is achieved. Additionally, these new CNC boring tools feature effective external sealing, effectively preventing coolant from contacting the electronic components within the digital display system.
Vibration Control for High-Speed Machining:
In high-speed boring, the rapid rotation of the boring head, centrifugal forces, and inherent imbalance of the head itself can induce significant vibration, potentially damaging the sensitive digital display equipment. New boring head designs incorporate built-in balancing mechanisms that can reduce or eliminate harmful vibrations during high-speed boring. Precision boring heads with digital readout screens are now capable of operating at high speeds up to 16,000 RPM.
Accurate Displacement Measurement:
The digital display screen of a new boring head directly shows the displacement of the tool slider, eliminating the need to determine displacement based on the rotation of the adjustment screw. Because the boring bar is directly mounted onto this tool slider, the DRO reading accurately reflects the actual displacement of the cutting tool, unaffected by backlash error in the screw. This characteristic allows for faster and more precise adjustment of the boring diameter and enables error compensation for machining deviations or tool wear.
Simplified Setup and Presetting:
Most boring tools require a "cut-and-measure" operation to determine their set size: a small portion of the hole is trial-bored, and then the resulting diameter is measured. Often, this necessitates removing the tool from the machine and mounting it on a presetting device for fine-tuning to achieve the correct diameter. This presetting operation was necessary because reading and presetting the vernier dials of conventional boring heads directly on the machine was quite difficult. However, this process could lead to out-of-tolerance bore sizes or workpiece damage.
Due to the difficulty in predicting the tool tip deviation when mounting the boring tool on the machine, the trial-cut and measure operation was used for presetting. If new, easy-to-read digital boring tools are employed, it becomes possible to perform fine adjustments to the boring diameter directly at the machine spindle. Even if the boring tool must be removed from the machine for size adjustment due to feed limitations of the machine spindle, the adjustment process for new digital boring tools is faster and more accurate.
Usage Methods
Tool Installation and Cleanliness:
During tool installation, particular attention must be paid to cleanliness. Whether for rough or finish boring, cleanliness is critical at every stage of installation and assembly. The assembly of the tool holder into the machine, the replacement of inserts, etc., must all be performed after wiping components clean. Carelessness is not acceptable.
Tool Presetting:
Tools must be preset; their dimensional accuracy and condition must meet requirements. For indexable boring tools (except single-point boring tools), manual trial cutting is generally not used, making pre-operation presetting extremely important. The preset dimensions must be precise, ideally set to the middle or lower limit of the tolerance, taking into account corrections and compensations for thermal factors. Tool presetting can be performed on dedicated presetting instruments, machine-mounted tool setters, or other measuring instruments.
Dynamic Runout Check:
After tool installation, a dynamic runout check must be performed. Dynamic runout is a comprehensive indicator reflecting the machine spindle accuracy, tool accuracy, and the connection accuracy between the tool and the machine. If this accuracy exceeds half or two-thirds of the required accuracy of the hole to be machined, machining cannot proceed. The cause must be identified and eliminated before proceeding. Operators must remember and strictly implement this step. Otherwise, the machined holes will not meet specifications.
Tool Life Management:
The service life of various parts of the tool should be determined through statistical methods or monitoring to ensure the reliability of machining accuracy. For single-point boring tools, this requirement can be somewhat lower, but for multi-edge boring tools, it is particularly important. The characteristic of indexable boring tool processing is: preset the tool, achieve the requirement in one machining pass. This necessitates ensuring the tool does not fail unexpectedly, otherwise unnecessary incidents can occur.
Installation Steps
Connect the tool block to the tool holder using bolt (1).
Install the fine boring tool unit onto the tool block.
Install the counterweight onto the sliding body.
Tool Adjustment:
Loosen the locking screw.
Roughly adjust the tool holder according to the scale lines, setting the tool tip size approximately 0.5mm smaller than the target machining size.
Adjust the counterweight using the same method to achieve dynamic balance.
Tighten the locking screw. Perform a trial bore and measure the size of the machined hole. Compare it with the required size and calculate the difference (how much smaller it is).
Loosen the locking screw. Rotate the dial (where each small division represents a 0.01mm change in cutting depth diameter) by the calculated difference.
Tighten the locking screw and machine the workpiece to the final size.
Precautions:
Pay attention to the adjustment of the fine boring head; do not apply excessive force (never rotate the dial beyond its specified range). Do not dismantle or tamper with areas sealed with red paint, as this could damage the fine adjustment mechanism. Perform regular maintenance and apply lubricating oil.

Design Methodology
1. Tool Design Concept and Characteristics
Clamp-type indexable turning tools involve mechanically mounting finished indexable inserts with defined geometry and cutting edges onto a tool shank. When one cutting edge is worn out and can no longer be used, a new cutting edge can be quickly deployed by indexing the insert. Using clamp-type indexable turning tools offers the following characteristics:
Stability: The tool's geometric parameters and cutting performance are stable. Positioning accuracy and repeatability are high, ensuring that variations in the tool tip position remain within the workpiece's tolerance limits and guaranteeing consistency in machining accuracy.
Reliability: The insert clamping is secure and less prone to loosening under the influence of cutting forces, impact, vibration, and heat. Tool life is long. There is no need for regrinding, operation is simple, and auxiliary time such as machine downtime for tool changes can be reduced.
Efficiency: Insert indexing is convenient and fast. The tool shank can be reused repeatedly, has a long service life, which can reduce inventory and simplify tool management.
Robust Design: The designed clamp-type indexable turning tool has a rake angle (γ) = -4° and an inclination angle (λ) = -4°, providing the cutting edge with sufficient strength to withstand significant cutting force impact and prevent chipping of the tool tip.
Standardization: The selected indexable turning insert is a standard rhombus-shaped national standard universal insert. This ensures automatic chip curling during cutting and stability in contour machining. It also facilitates tool standardization and serialization, suitable for copy turning in automated production.
Simple Clamping: The tool employs a screw-clamp structure, where a screw clamps the insert through a countersunk hole in the insert. This structure is simple, has few parts, offers high positioning accuracy, high repeatability for edge indexing, and provides ample chip pocket space.
Advanced Insert Coating: Based on the workpiece material characteristics and considering cutting edge wear during machining, a TiC+Al₂O₃+TiN composite coated insert is used. This type of insert reduces friction between the chip and the tool, maintains high hardness and good oxidation resistance even at high cutting temperatures, thereby increasing insert service life and reducing part surface roughness.
2. Tool Design Method
The required machining involved the internal spherical surfaces of a differential housing with dimensions S=φ138.5mm, φ124mm, and φ161mm.
Workpiece Material: Nodular Cast Iron GH45-33-15 (Core hardness HB150~190).
Machining Accuracy Requirements: Positional tolerance relative to datum: φ0.03mm, Surface roughness: Ra 1.6 µm.
Cutting Parameters: Cutting speed (v_c) = 2 m/s, Feed rate (f) = 0.4 mm/rev, Depth of cut (a_p) = 3 mm.
Machine Tool: S1-325 CNC Machine.
The tool design steps were as follows:
Insert Material Selection: Based on the workpiece material and machining requirements, the insert material selected was a new composite coating (TiC+Al₂O₃+TiN) on a YG6 carbide substrate.
Insert Clamping Method: Based on the workpiece characteristics and cutting parameters, the insert clamping form was designed as a screw-clamp structure.
Insert Type Selection: The indexable insert type selected was a standard rhombus universal insert (ISO). The included tip angle is 55°, normal clearance angle is 7°, with a V-type chipbreaker groove on one side. Insert thickness S=3.97mm, tool nose radius r_ε = 0.4 ± 0.1 mm. Based on the machining accuracy requirements, insert precision grade M was selected. The determined indexable insert model was DCMT11T304-V1.
Cutting Edge Length Check: The required cutting edge length S_a = a_p / (sin κ_r * cos λ) = 3 / (sin 62.5° * cos -4°) ≈ 3.39 mm. For rough turning, the cutting edge length L should satisfy L ≥ 1.5 * S_a ≈ 5.086 mm. The selected insert's primary cutting edge length L ≈ 11.6 mm, which meets the cutting requirement.
Tool Shank Connection: The connection method between the indexable turning tool shank and the tool adapter was determined based on the machine model and center height. To increase shank strength, the shank cross-section was designed as a non-uniform section. The tool adapter and tool shank are connected via a self-locking wedge interface, enabling quick, accurate, and reliable tool mounting and dismounting.
3. The Designed Clamp-Type Indexable Turning Tool Head
By replacing the original spherical spot facing drill method with the clamp-type indexable turning method, the need for dedicated fixtures was eliminated. The internal spherical surfaces of the differential housing could be machined in a single setup on the CNC machine. Due to the reduction in auxiliary time like tool changes, the processing efficiency of the CNC machine was improved. The tools require no regrinding, tool durability increased, resulting in a doubling of production efficiency and a 75% reduction in tooling costs. As machining errors associated with tool regrinding in the original method were avoided, product quality was effectively guaranteed.

person: Mr. Gong
Tel: +86 0769-82380083
Mobile phone:+86 15362883951
Email: info@jimmytool.com
Website: www.jimmytool.com